The Everybody Stylist | Design Sprint Case Study

Project Overview
Background & Problem
The idea for this project came to me from a problem I had while looking for an outfit to wear for engagement photos. I would find a shirt or a pair of shoes that I liked, but didn't know what would match well with it.
Suggested is a new way to bring a personal stylist to the average, every day shopper. Suggested wants to give shoppers a more user-centered experience by giving them the power to be more confident while buying products.
Suggested is a tool that lets store's create outfits for their users to see in stores. Fashion is something that can be creative and expresses individuality, but most people shopping for clothing don't actually know what matches and what doesn't. Suggested allows a brand's fashion expert to build outfits and be found in stores by a shopper scanning the barcode on a piece of clothing they like and seeing items that match the scanned item.
Goals & Scope
Design a web app for stores that is simple, fast, and easy to use
Design the UI for what their customers would see as a result of using the tool
Tools
Role
Team
Timeline
Scan me to see what it would look like when a shopper scans an item in a store!

Design Process

Research
Exploratory Research
Since this is a new product, I decided to start by looking around at current solutions to this problem and verify what they were missing. I came across companies and services like Stitch Fix, Trunk Club, and DailyLook. They all had a similar approach of involving filling out a form, working with a "personal" stylist, and getting a box shipped to your door full of clothes you haven't tried on yet. The only real difference between them is the way their "Style Quiz" works.
Pain Points Overview
![]() No in store integration
No in store integration
![]() Stylist and shipping time
Stylist and shipping time
![]() Don't know exactly what you're
getting until it
arrives
Don't know exactly what you're
getting until it
arrives
![]() Exchange time
Exchange time

User Interviews
The next step of my process was interviewing three different users. Two users who shop frequently and keep up with current trends and a third who really only shops for stuff they absolutely need. While the users were talking, I would take down notes to later help with "How Might We's?".
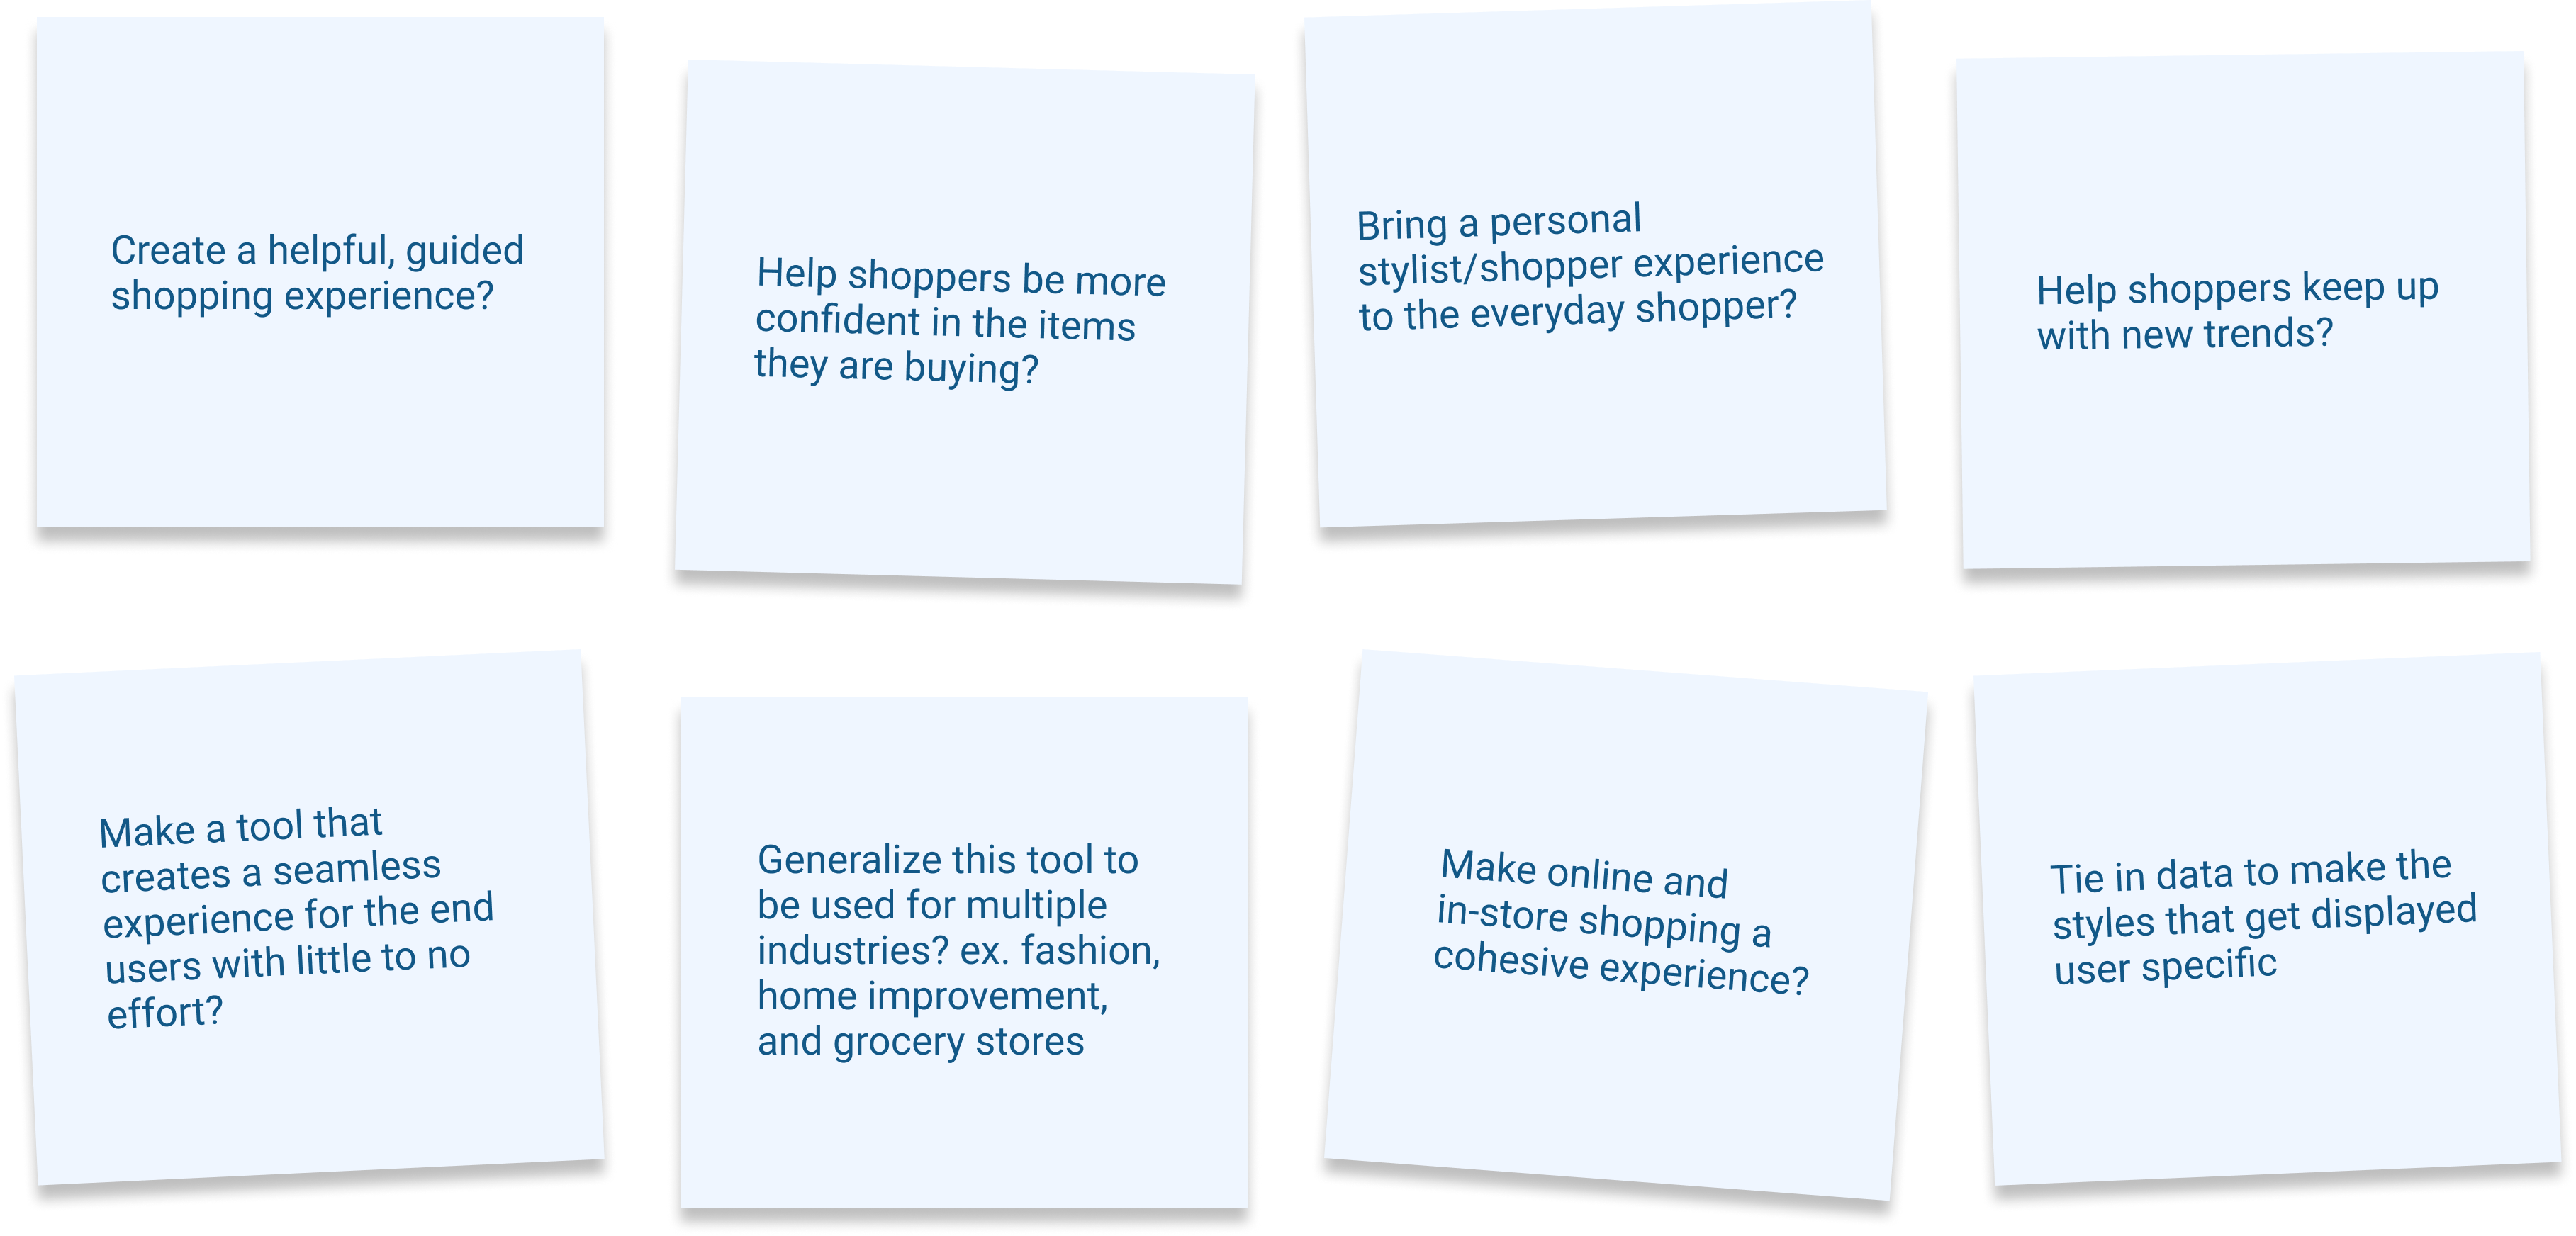
How Might We...?